TopsDecor.com Home Decor Ideas
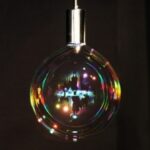
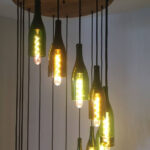
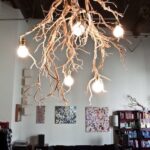
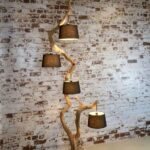
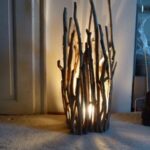
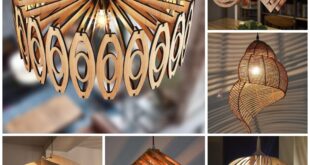
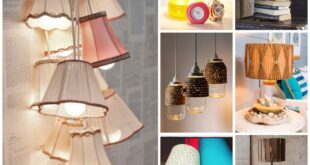
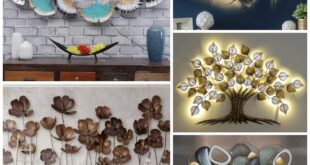
Lamps are very useful things that we get for our spaces. It emits pleasant light when we need it and can also serve as a decoration. There are many ways you can make your own lamps and add a personal touch to their designs. The key is knowing what you want and looking for ways to create it. Do-it-yourself lamps not only allow you to explore your inner ideas of creativity, but it is also cheaper than buying a lamp product. Do-it-yourself crafts also help to get rid of old things at home that are just lying around. You can get inspiration from using these materials and turn them into something new and artistic.
So why not start implementing your very own lamp idea?
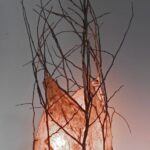
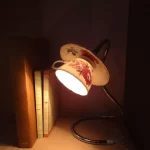
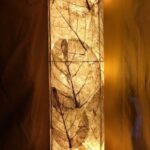
What you are about to make is a cheap but very pretty Japanese style lamp where you can use recycled parts that are easy to find around the house. There are many tutorials you can search for if you want more detailed designs. However, below are the basics you may want to learn if you want to make a simple but unique lamp.
Above all, make sure you follow the steps with caution. Remember that you are dealing with light bulbs and wires, so you also need to be careful.
Things you need:
Scissors
Glue gun
Knife
Nail clippers
2-layer corrugated cardboard
Bamboo sticks or chopsticks
Craft paper
Light bulb socket
The light bulb
Plug
2 core meters of flex
The first thing you need to do is make a frame for your lamp idea. Decide how big you want your lamp to be. It could be a smaller lamp or something larger. This also depends on the materials you have, especially those you use for the frame. You can either use the same length or shorten it. For this basic lamp you can choose the A4 format. Just make sure that the lamp is taller and not wider, otherwise the lamp will look disproportionate. Cut two rods for the frame and another rod to fit the width of the lamp. Form a rectangle with your sticks by gluing the longer sticks to the shorter sticks or the tall sticks to the wide sticks
After you’re done with that, it’s time to decide on the design of this side of the lamp. You can go for abstract patterns or stripes, which is easier to start with. This pattern allows you to get creative and create your own patterns, provided you have an idea of how to construct them with the sticks you have. Make sure you can glue the sticks together and that they won’t fall off when you hold the frame alone.
You can repeat the design on one side and create a different one for the remaining sides, or you can duplicate the idea and make it consistent on all sides of the lamp. It all depends on you and the design you are going for. Just make sure that all ends are glued and that the sticks don’t fall out as soon as you hold the frame upright.
Once you’re done with that, it’s time to attach the lamp’s cover. Place the construction paper under the frame. Make sure the frame is glued to the frame. Wait for the glue to dry completely. Once everything has hardened, carefully trim the edges of the paper to fit the frame. Once you’re done with one page, it’s time to work on the remaining pages.
It’s time to lay the wires. Carefully cut a few centimeters of the cable’s insulation, otherwise it may cause a short circuit that you don’t want. Wire the end of the cable to the socket. After making sure no copper part is visible, connect the other end to the connector. Make sure a backup is installed. If you want, you can install the torpedo switch near the power outlet or anywhere else you want it. When you’re done, check carefully to see if the bulb is lit. Carry out the inspection outside the paper area to avoid fires.
Now it’s time to make the base of the lamp. Get the corrugated cardboard and cut it to the width of your side walls. Add at least two or more layers and secure with glue for maximum strength. Make sure you cut a shallow hole for the cable to pass through. Then glue the socket firmly to the base, positioning the flex so that it fits into the hole.
Then it’s time to put the side walls together. Glue the sides together, making sure they fit together perfectly, otherwise it will look strange if one side is higher than the other. Also, make sure you don’t glue the base or you will have problems replacing the bulb.
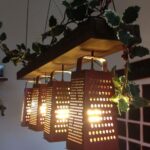
Then Viola! Your masterpiece is ready!
Note that since you are working with paper with this lamp, it is advisable to choose a bulb with a softer light. Choose a light bulb that doesn’t heat up the paper as much in less than an hour. The lamp is very light and thin, so placing it in sensitive areas is taboo.