TopsDecor.com Home Decor Ideas
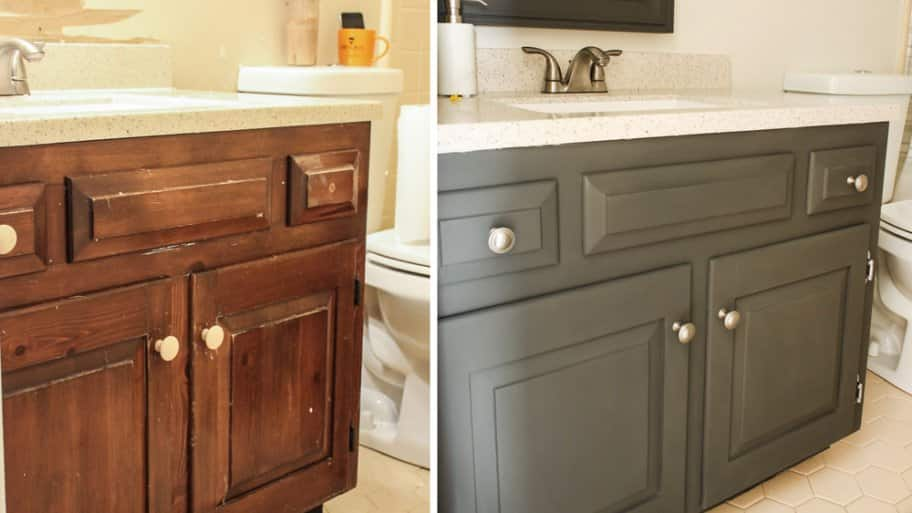
The difficult thing about this type of furniture restoration project is to start it. As soon as you start, you realize that they are simple and that you can finish them with pure dedication. In most cases, no technical knowledge is required. For example, painting a cabinet seems to be a carpenter thing, but even a novice is capable of this task. If it’s time to renovate the look of your home and you want to know how to paint a vanity in the bathroom, read on.
Painting a vanity in the bathroom can be the perfect time to make other adjustments and improvements, e.g. B. changing hinges, buttons and other elements. You could even replace the old faucet with a modern one. However, let’s see everything you need step by step.
Necessary preparations
You can’t start without the materials
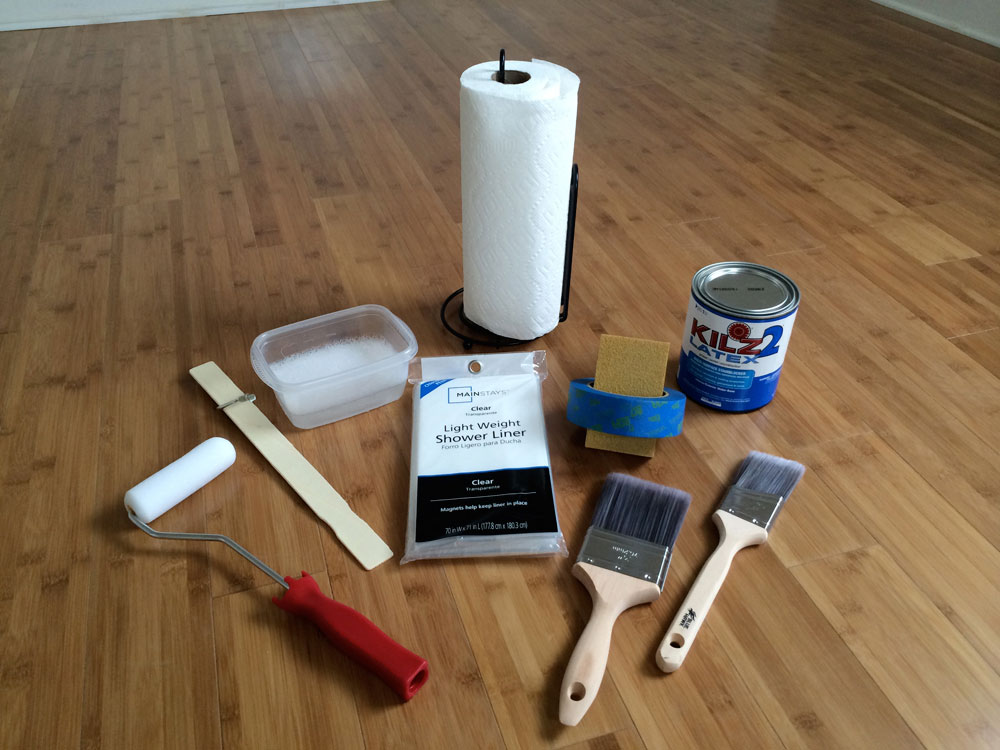
Before you start the project, you should first make sure that you have all the necessary materials and materials. Some basic woodworking tools include foam roller, alcohol, primer, household cleaner, sandpaper, latex-based acrylic paint of the desired color, a brush, tape, and newspapers or plastic wrap to protect the floor
You will also need other materials, depending on the state of your vanity and how you want to approach the project. You may even need a screwdriver, hammer, and razor if you want to carve the wood.
It’s time to take the closet apart
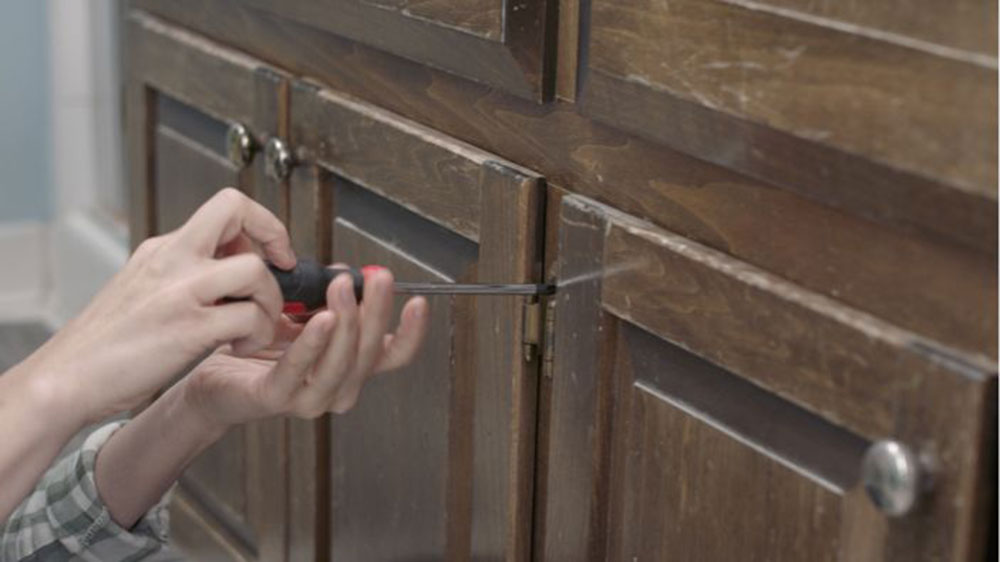
When all the materials are ready, it’s time to cut the vanity into pieces. As with other cabinets, you have to remove the doors and drawers from the mainframe to paint a vanity.
It is recommended to take photos of the drawers to have a reference for later. In addition, you can use the painter’s tape to label the pieces to know where they are.
To remove the hinges, simply unscrew them from the wood or plastic. Keep them in a safe place, e.g. B. in a rag to avoid loss.
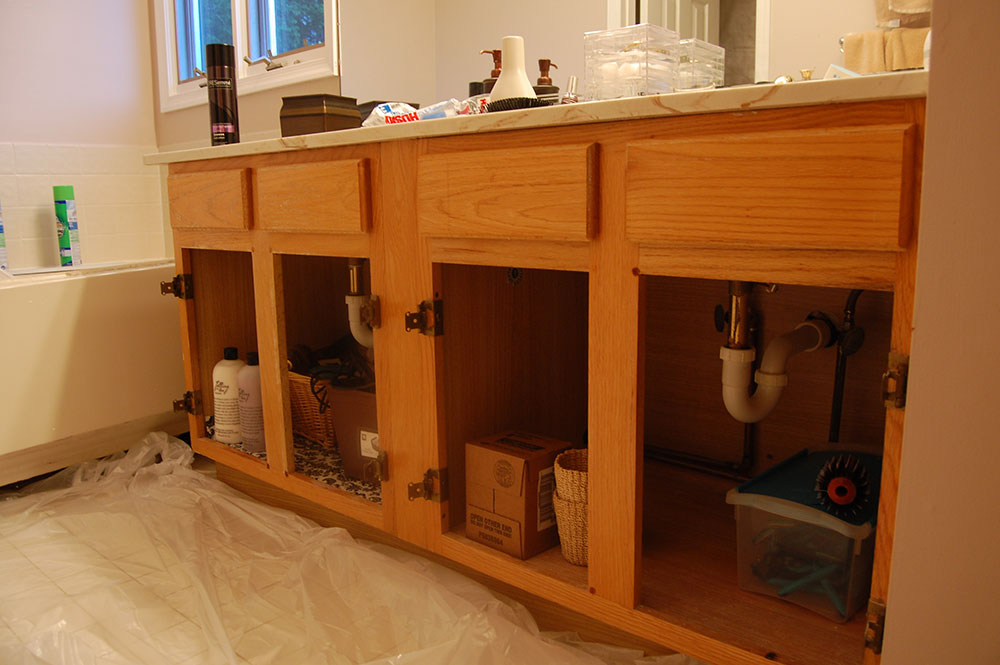
You should also remove other items that you want to replace, e.g. B. taps, as this makes painting and renovation easier.
Some drawers can be completely disassembled so that you can remove the front cover. Vanities of this kind are much easier to remodel.
If necessary, check whether your new tap fits into the existing holes in the washbasin. If not, you should cut or fill the leaves as appropriate. Wooden spatula is perfect for quick filling and you only need to sand it when it is dry.
If you need new holes, they will be made at the end of the painting. Now all you have to do is cover the holes that are no longer needed.
You need to clean it thoroughly
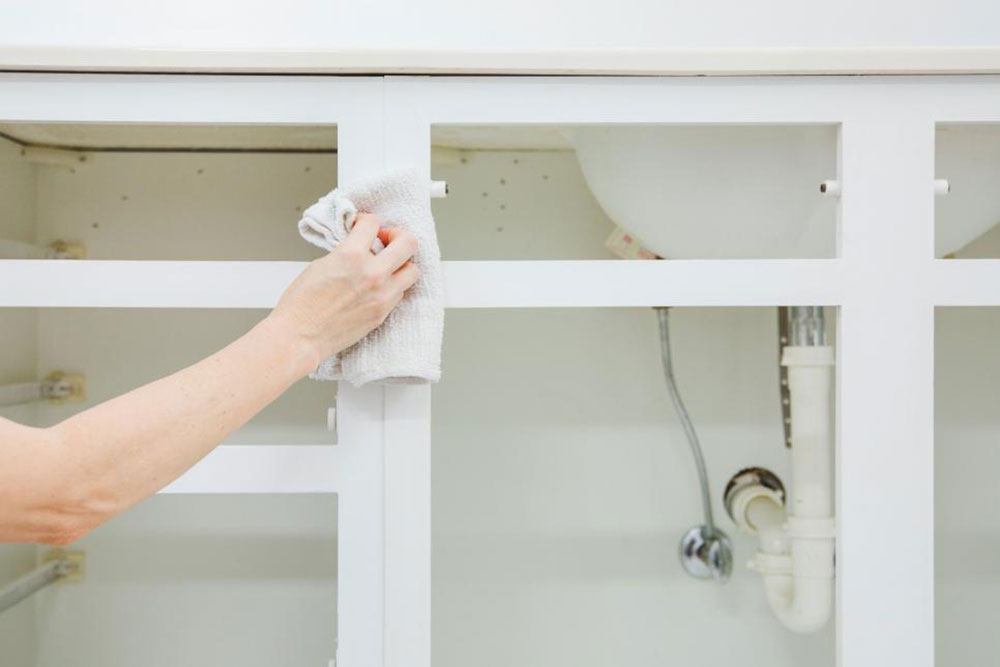
You can’t start painting when your closet is dirty. All particles, including those that arise when the drawers are being sanded, remain glued when painting, creating a rough texture that breaks shortly afterwards.
Since the materials in washbasins are largely waterproof, you can wash them superficially with soap and water. Remove stubborn stains with a degreaser. Then rinse twice and let dry.
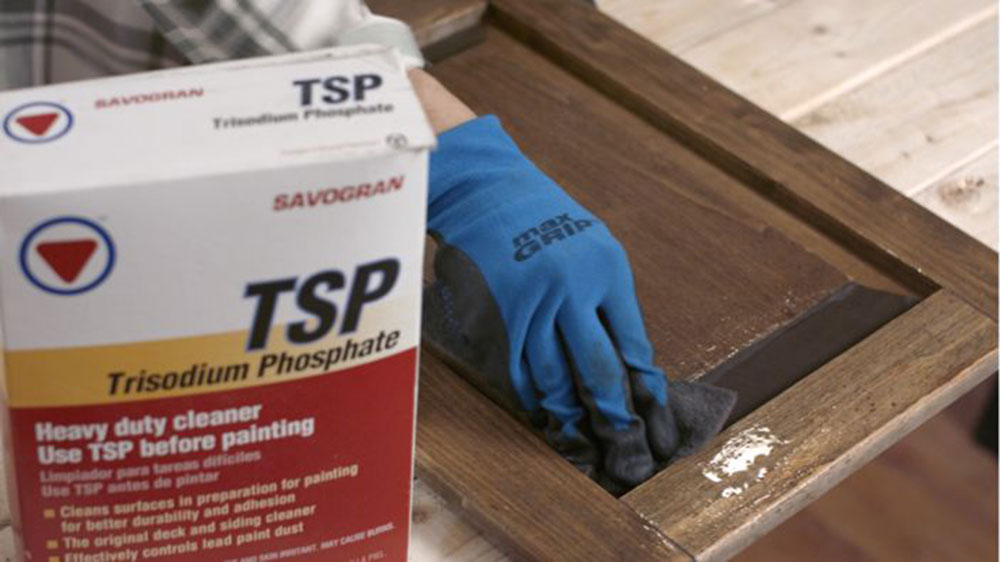
In the event that you need more cleaning, the use of trisodium phosphate (TSP) is recommended. You must wear gloves to deal with this connection. Dilute a little TSP in water and pour the result into a sponge. This will clean each drawer until stains are removed. Remember to dry your vanity with a dry cloth.
Whenever you sand an object, you should clean the washstand. This microscopic dust can be removed with a vacuum cleaner and a damp cloth. Old paint can be removed with sandpaper, but larger parts can be removed by hand if they fall off.
Finally, objects that are glued with silicone or another adhesive can leave residues of the adhesive in the cabinet. This is easy to remove with alcohol and the TSP solution.
Repair and prepare the holes

As mentioned earlier, you may want to make a brand new DIY vanity with modern taps. To do this, you need to fix a few things first. If your vanity is scratched and hurt, it’s time to fix these bugs. If you change the faucet or other objects, you need to prepare the holes for installation.
The bumps can be easily repaired with wood putty. Apply a layer of white putty with a flexible spatula and press the connection firmly. If it is compact, remove the excess with the spatula edge. The process is similar if you want to fill pipe holes.
If the filler is dry, you will need to sand it to remove any defects.
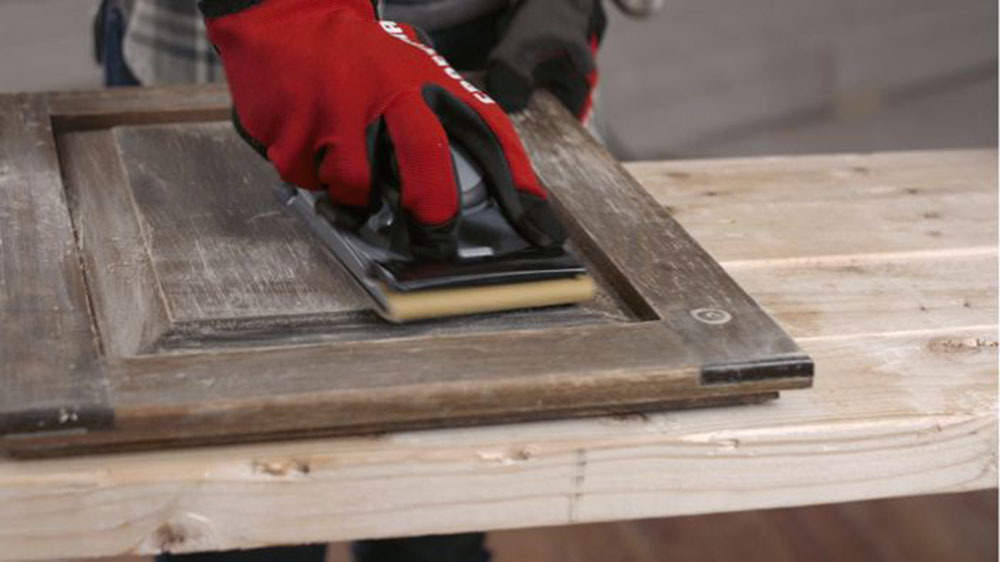
If your closet has a protection or primer, you should sand it to get a slightly rustic texture so the paint has a surface to stick to. This finish is achieved with 220 grit sandpaper.
Remember to grind the corners too so they are smooth. In the end you have to clean the generated waste. Now you can start with the decorative processing.
How to paint a vanity: it’s time to be creative
First the base layer
The intent to achieve a slightly rustic surface was to be able to apply a primer that will serve as a canvas for your new painting. Your closets should be as good as new after the preparations.
You must select the type of primer that corresponds to the color to be used. You can find out which combinations work in your hardware store. You just have to remember that the color must be even if the primer is based on water.
Knowing how to paint a bathroom vanity is just the beginning. The most important thing is to have the pulse for the different layers that you need to paint. For example, the primer must be applied to all areas that you want to paint. A uniform coat of paint should be enough as its main function is to support the paint’s adhesion.
After the primer has dried, the sanding paper must be carefully brushed to remove air bubbles and excess compounds.
The primer should dry for at least 24 hours before you can paint over it. Depending on the manufacturer, this time may be shorter, so you need to consult the product packaging.
It’s good to put some newspapers or plastic blankets on the floor in this part to avoid stains.
Paint your bathroom cabinets
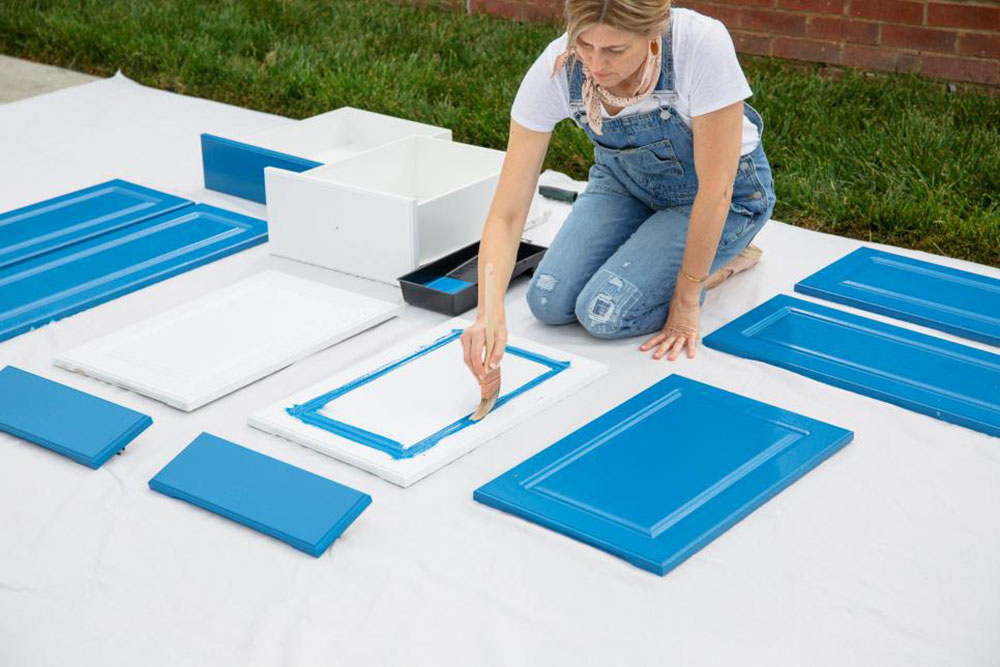
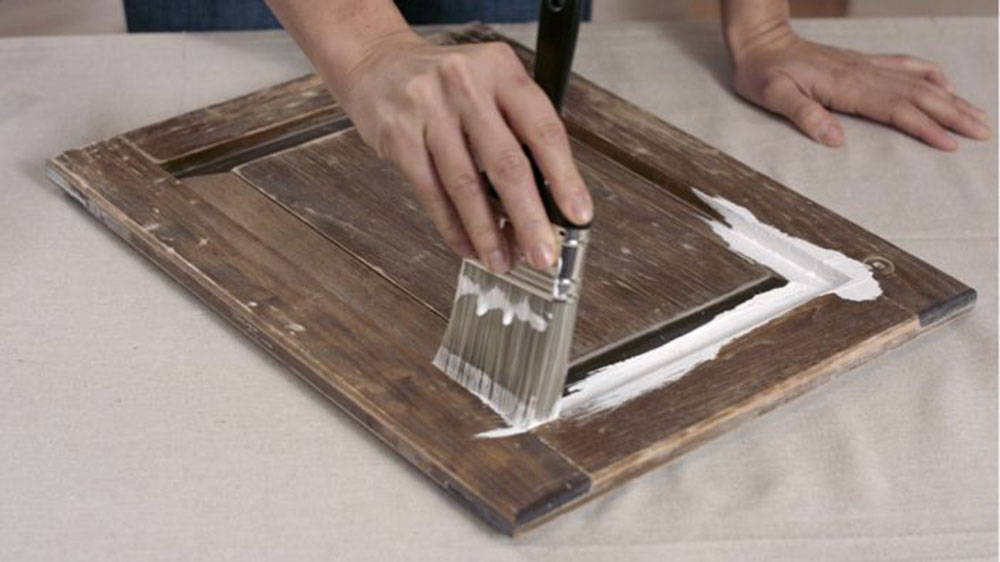
With dry primer, wipe off the residue and get ready to paint. First use a roller to cover large areas. Start with the back and edges of doors and drawers.
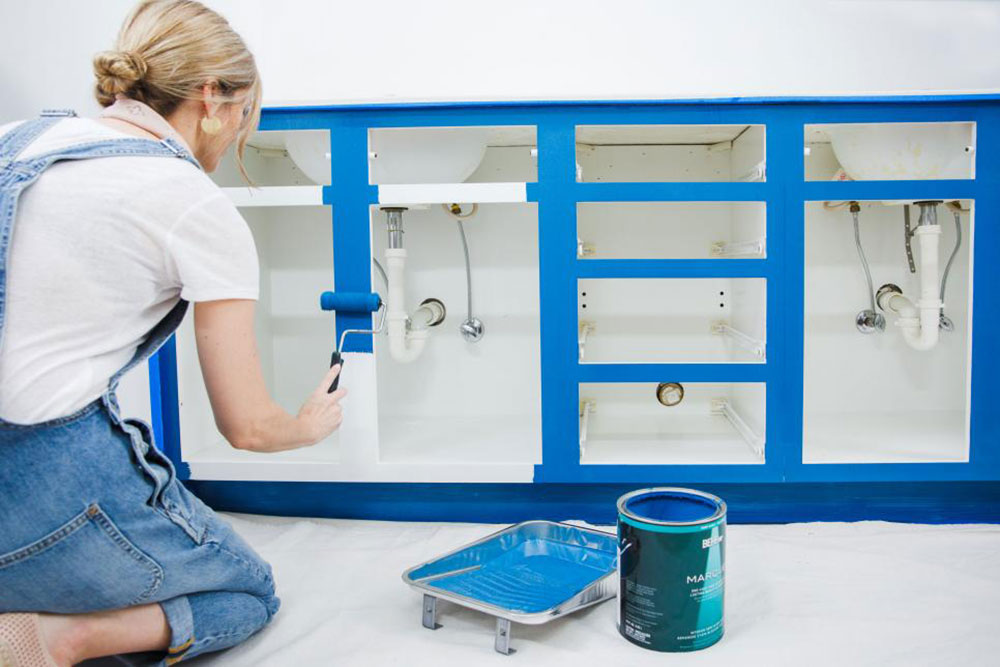
For the front you see all the time, use a large area roller and a brush to paint in detail. It’s easier to get a smooth finish with a brush, but it also depends on whether it’s the right one.
You already know how to paint a washbasin, and there is only one step left.
Assemble the new vanity
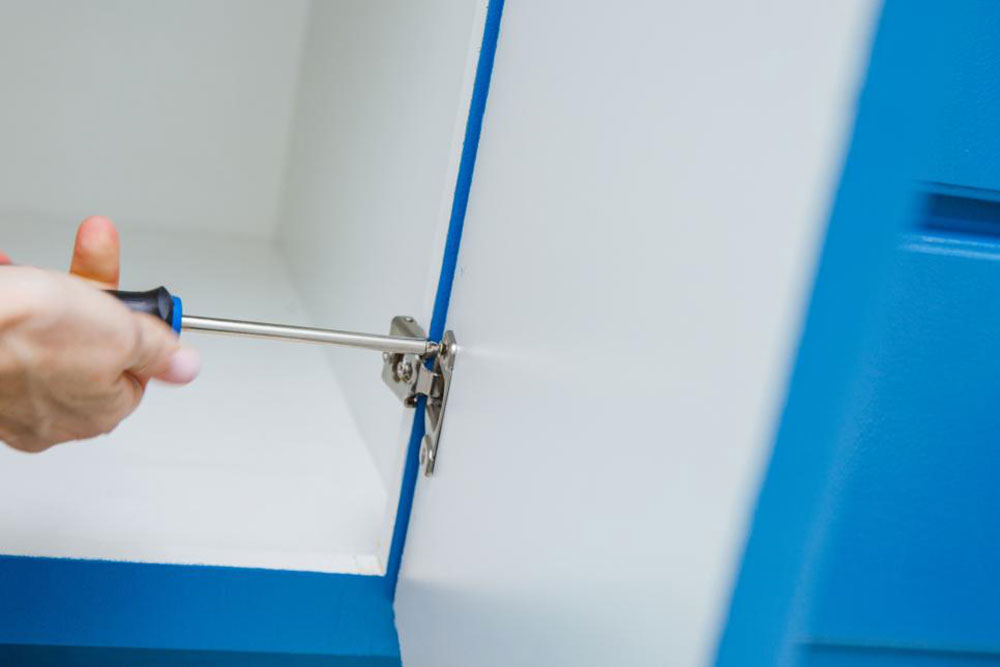
Let the paint dry overnight as with the primer. When all the parts are dry, it’s time to assemble your new vanity. Use the photos and labels to assemble it.
Start by assembling the taps and pipes (drill new holes if necessary), then install the drawers and finish with the doors.
Final thoughts on how to paint a washstand
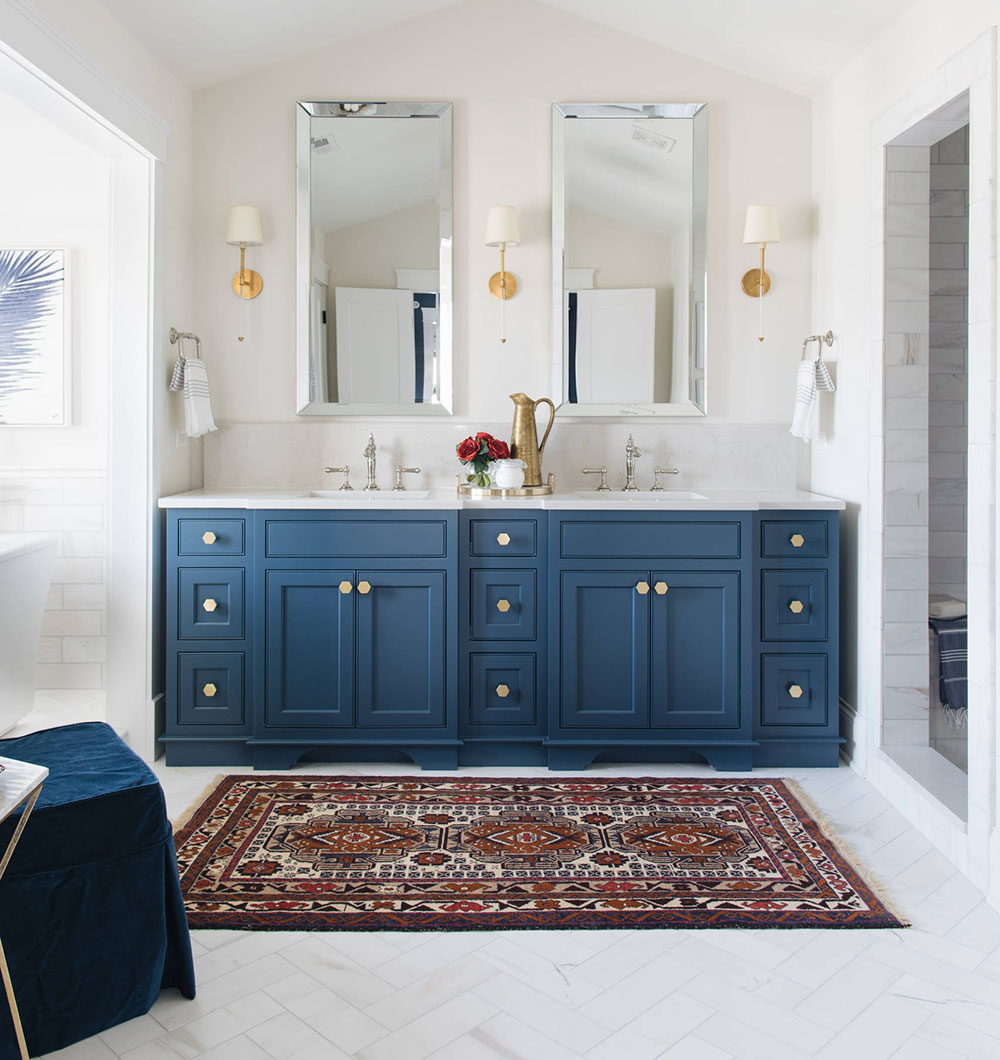
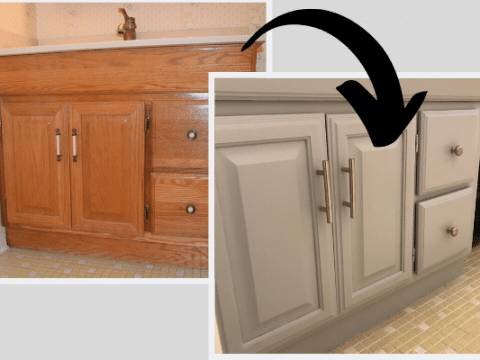
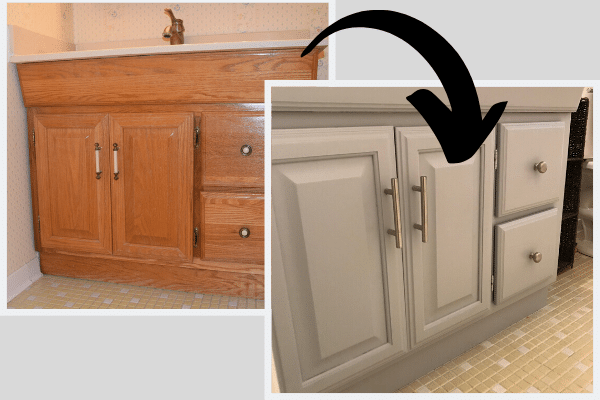
Image source: Timber Trails Development Company
We end this little guide with some tips that can make this process easier, especially for newbies.
You can do this entire process right in your bathroom. However, it is recommended to remove the vanity to completely disassemble it.
Remember to always wear a mask to avoid inhaling particle particles and strong color smells. You should work in an area with good ventilation.
There are special colors that do not require a primer. Check with the hardware store if these are available as this will make the project faster and easier.
If you enjoyed reading this article about painting a vanity, you should also read this: