TopsDecor.com Home Decor Ideas
If you want to install your own air conditioner, you need basic instructions to make the process easier. In most cases, you live in a house that already has air conditioning. At the same time, there may be cases in which the house never had central air. If you do not yet have an internal oven, you must ensure that the oven has been installed by a professional. You can do a lot of the work yourself by dealing with the air conditioner, and you can follow every step in the process to get amazing results.
1. Where’s the condenser?
Your condenser should be outside, a few inches from the house, and on a flat surface. If you have a capacitor, you can remove that capacitor from the surface on which it is installed. You should remove the screws from the old capacitor, remove the capacitor, and install the new capacitor. You need to make sure the condenser is bolted to the supplied concrete slab and check the hoses that were attached to the old condenser.
You should turn off the circuit breaker for the AC unit and carefully remove the wiring. You can put the wiring aside and possibly replace it if it is frayed or damaged. You may want to cover the wire tips if you think they could be damaged during work.
If you remove the hoses from the old condenser, you should also mark these hoses. The hoses are all slightly different and can be confused when installing the condenser. This is an easy way to avoid problems.
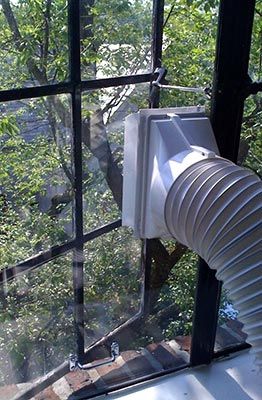
2. Check the hoses
As described in JNJ air conditioning Website, you need to check the hoses in the house to make sure they are not damaged. If you have long hoses, kinks may need to be repaired, or you may need to replace the hoses. You should also make sure that the hoses are properly connected to the oven. The hoses may leak while the device is running. You should therefore look over the hoses while the AC current is running.
3. Check the coils
You need to check the coils on your condenser to make sure they hold the refrigerant. If the coils are leaking, you must replace them before proceeding. You cannot top up the refrigerant yourself and should work with a professional to help you with these minor problems.
4. Check the oven
You should check the oven to make sure it is properly connected to the condenser. The oven has a light on the front that flashes if you have trouble with the oven or connection. You can search for the flashing light patterns in the instruction manual. You can fix any problems that arise and continue with the installation. The air conditioner can cause problems if the hoses are not properly connected. If the condenser does not provide the correct amount of cooling power, you may get a warning.
5. Check the blower
The fan connected to the oven should be checked to make sure it is blowing properly. If the blades are damaged, you should replace them as soon as possible. The blower fan should have a clean casing that is not dented and you should make sure that it does not make any bad noises when switched on. You can test the blower by pressing the fan switch on your thermostat.
The blower can be easily replaced and should be properly wired. Turn off the circuit breakers to make sure you are safe when wiring the blower and replace the air filters.
6. Replace the thermostat
You should replace the thermostat so that you have something that is easy to use. The thermostat should have a program that can save energy and the thermostat should be properly connected to the wall circuits. If the thermostat is in poor condition, the AC power may not trip properly. You may have completed the installation incorrectly, but not.
7. Wire everything up
You can reconnect the capacitor to the power supply. You can turn on the circuit breakers to make sure the AC unit is powered, and you should go outside again to make sure the wires aren’t sparking. If you wire everything up, make sure you haven’t pulled or torn the cables. You should check the wires again to make sure you have no damage. You can either remove the wiring, repair the wiring, or replace the wiring ends with something nicer. In some cases, you may need to buy a special connector that will connect to the capacitor.
8. Test the system
The air conditioner for your home should be tested before you assume that it is working properly. Turn on the circuit breakers, turn on the fan, and watch the blower. You must also hold your hand in front of a vent to make sure the air is cold. If the air is not cold, you need to check your connections to the condenser. If the air doesn’t blow, you should check the blower. If the system does not start at all, you should check the wiring.
You can turn on the system without a filter and add the air filter if you know the blower is working. This is the easiest way for you to make sure everything is working and you need to test the system once a month to find other problems that may arise.
Conclusion
The best thing about a DIY air conditioner is that you can save money. You pay no labor costs and learn a lot about your home. Follow these steps to install your AC, test your AC, and troubleshoot any problems that may arise.