TopsDecor.com Home Decor Ideas
It is impressive how good the wood has remained as one of the best options for decorating our house. Not only can we achieve a rustic finish, we can also create an elegant style with the right treatment. The problem with overpainting stained wood is that, depending on the type of material, it can be affected to such an extent that it is irretrievably damaged.
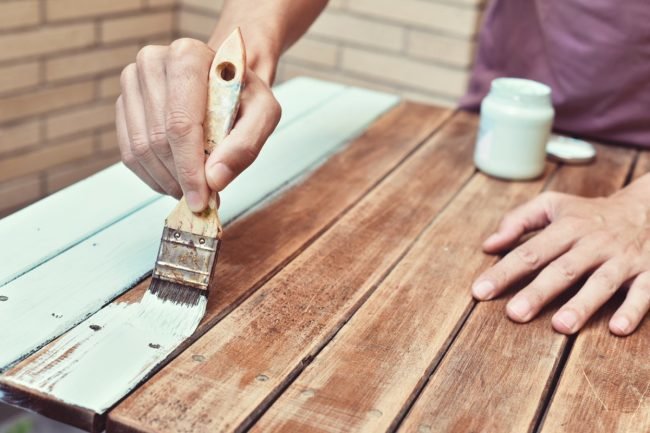
Painting stained wood is possible, and it’s a way to revitalize the finish if it has deteriorated over time (or if we’re looking for a change in the environment).
The color is easy to use, allows us to achieve multiple styles, is economical and we do not have to install new decorative parts to create a new classic, bold or modern environment.
When it comes to wood, we can face an enemy that is difficult to deal with, especially since it is probably painted. The paint acts as a protective layer against external influences and is therefore difficult to treat.
Painting over stained wood becomes more complicated when you find that the varnish smoothes the porous surface of the wood. This makes the adhesion of layers of paint more difficult.
Today we give you hope for your future decoration plans. All types of lacquered wood can be repainted. Depending on the type of paint, the process will change slightly (unless it is a structural piece of the house or if it is wood in a piece of furniture). The darker paint can also be changed.
Must the paint be removed?
Certainly. At least if we want a quality result. Lacquered wood hampers the painting process.
We also have to take into account that not all of the wood has been painted. In fact, with very old wood, this probably lost the varnish layer a long time ago. First of all, we can check by hand whether the wood feels soft. Generally, unpainted wood is porous or splintery.
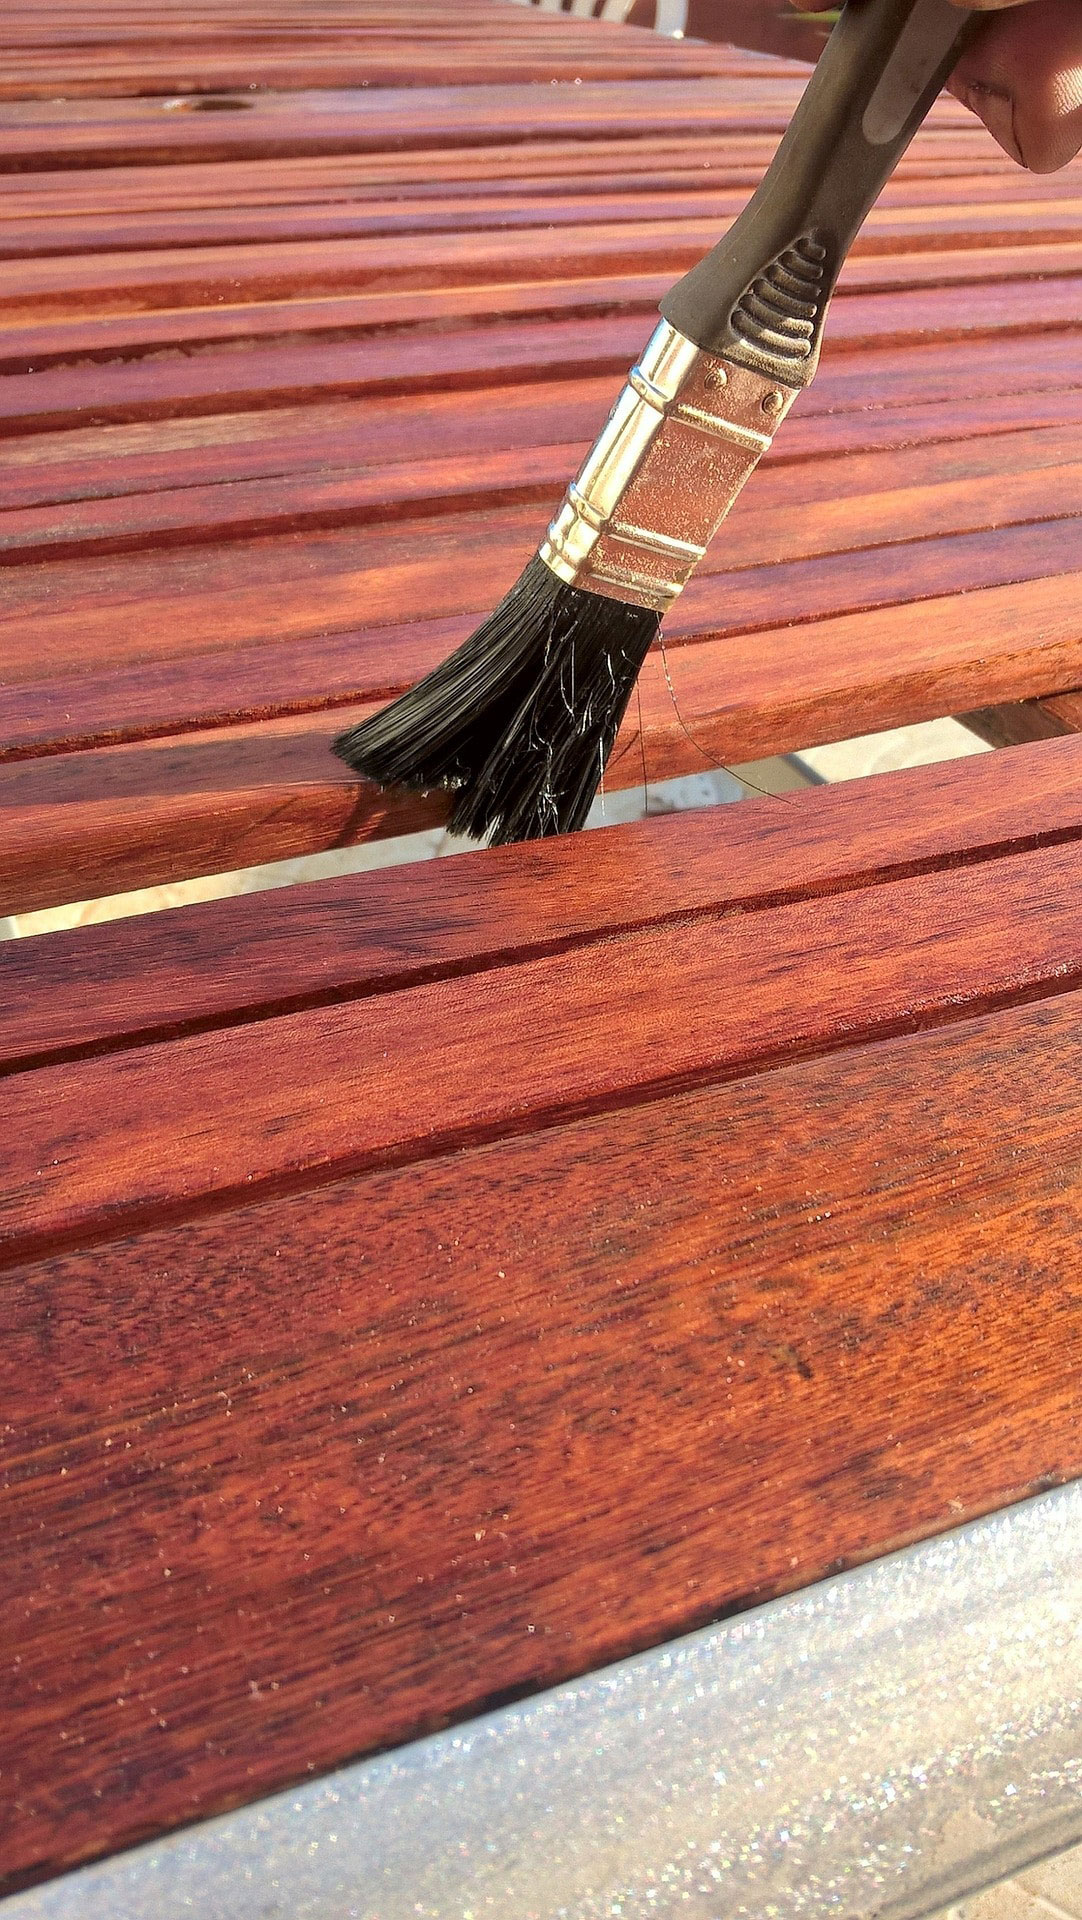
Brush over stained wood? Steps and materials
Materials we will need
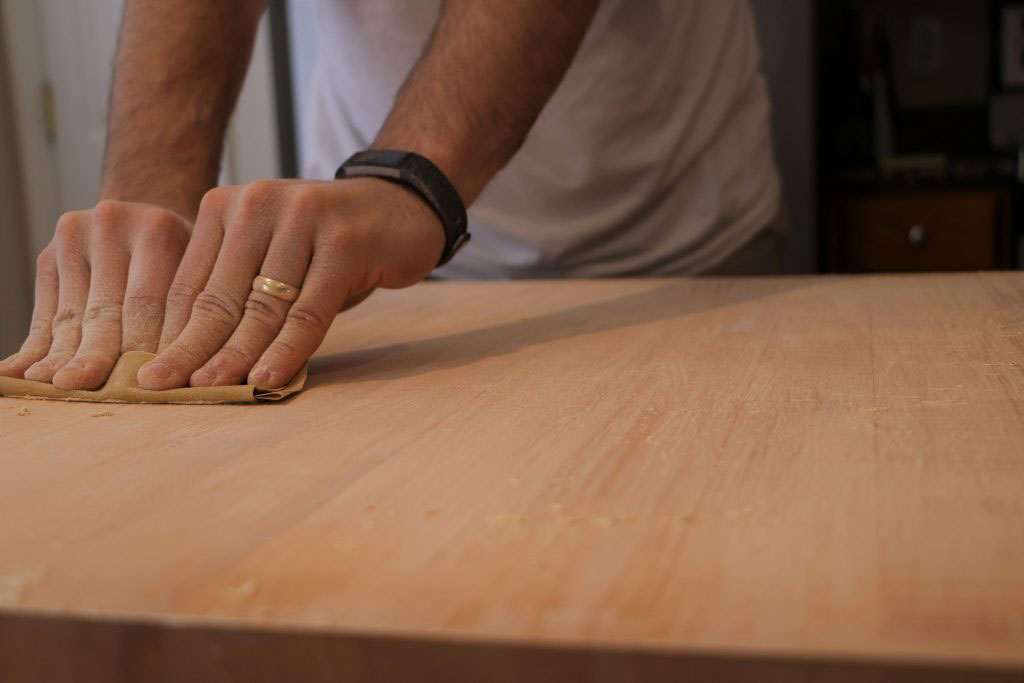
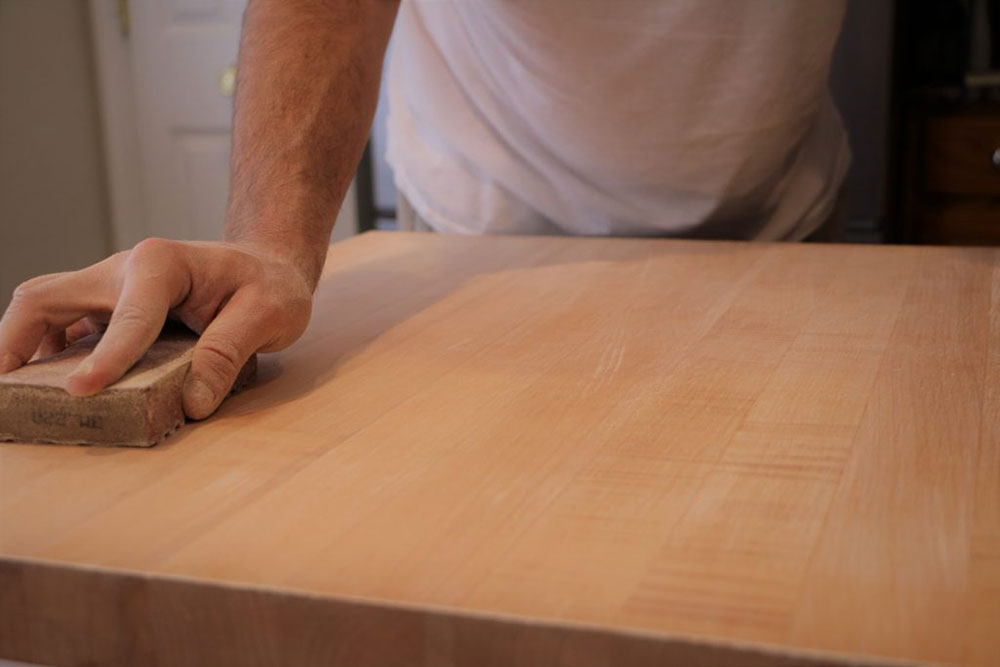
- Sandpaper with a grit of 150
- primer
- Tack cloth
- Tarpaulins, newspapers or other materials that we can use to protect walls and floors
- Paint for the wood of the color we want
- Brushes in several sizes
- A screwdriver or a utility knife if we have decorations, buttons or blacksmiths in general in the wood.
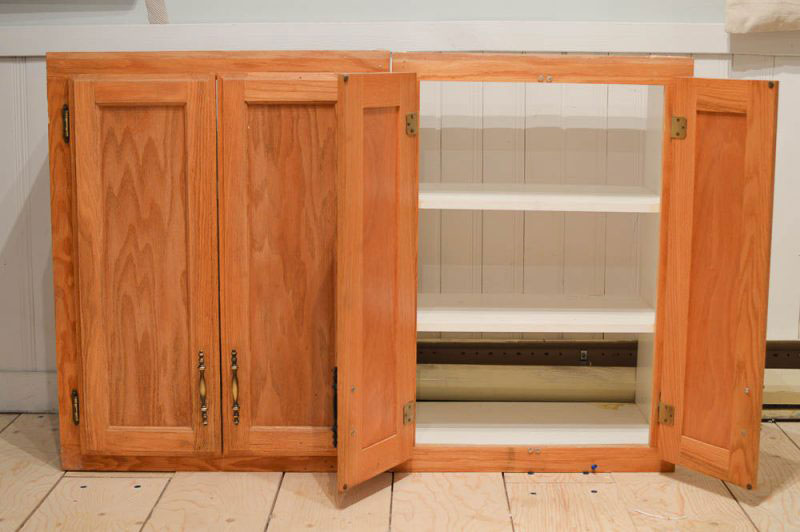
Remove the accessories
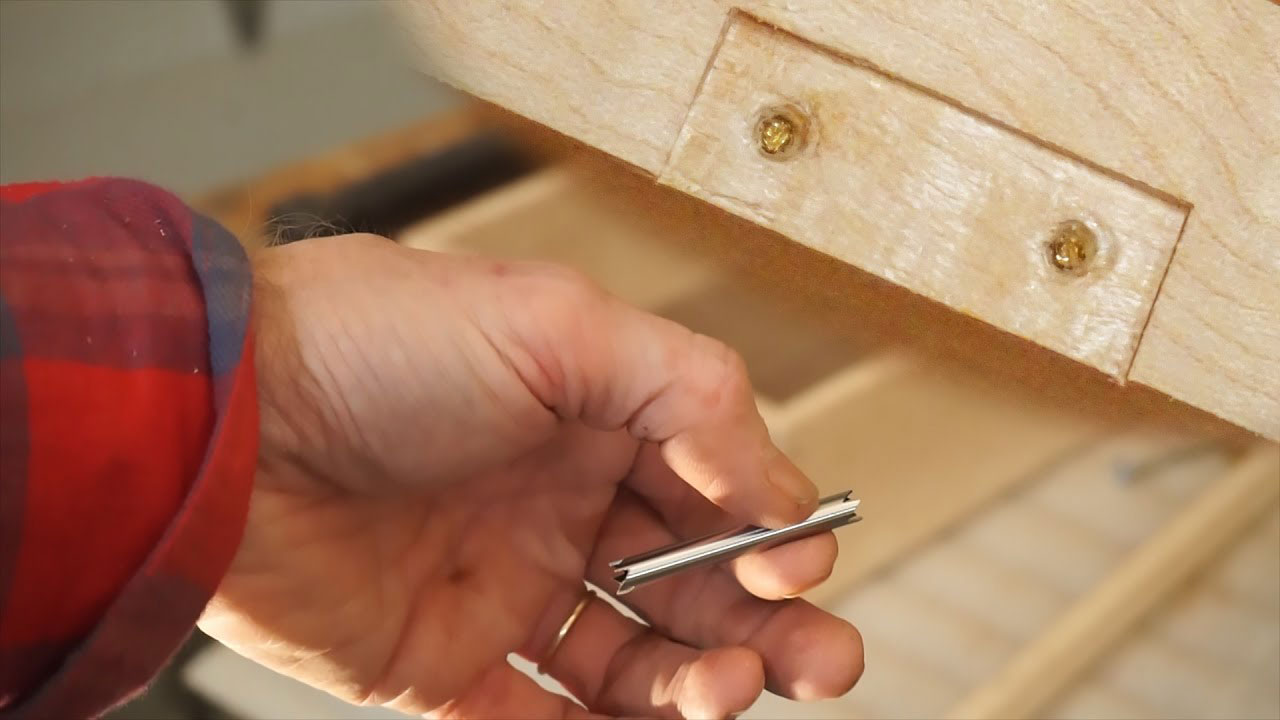
If we have forgings installed on our stained wooden strip, we have to remove them before each action so that the removal of the paint and the subsequent painting are homogeneous.
We need to remove items from the wood in the following cases: if there are nails or screws (we need to remove them and then fill the holes with putty to get a smooth surface), the handles, drawers and knobs.
Always have a damp cloth ready to clean the paint if it falls on unwanted parts. If the paint is based on oil, then we need to moisten it with thinner.
Prepare the surface to be painted
We have already mentioned it, but it is important to emphasize that painting over stained wood is all about getting ready. The surface that we paint must be clean and dry. There must be no chip that could interfere with painting.
With an air extractor we can blow the dirt. The imperfections can also be sanded with fine-grain paper. If there is still dust on the surface, remove it with a damp cloth.
Another step of preparation that we need to consider is whether our wood is greasy. If so, we need to purchase trisodium phosphate to eliminate it.
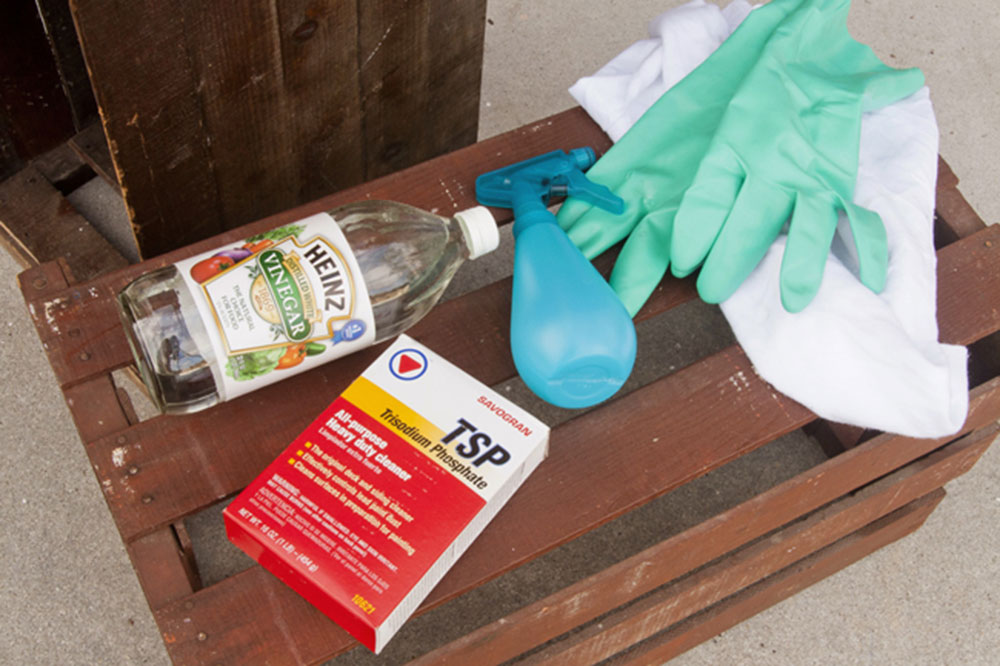
The process is simple: with gloves, dip a sponge into the mass and rub the wooden surface. Wait a minute or two and then remove it with another sponge. Finally rinse the wood. Trisodium phosphate should be handled with caution. If it comes into contact with the skin, you should rinse the area quickly.
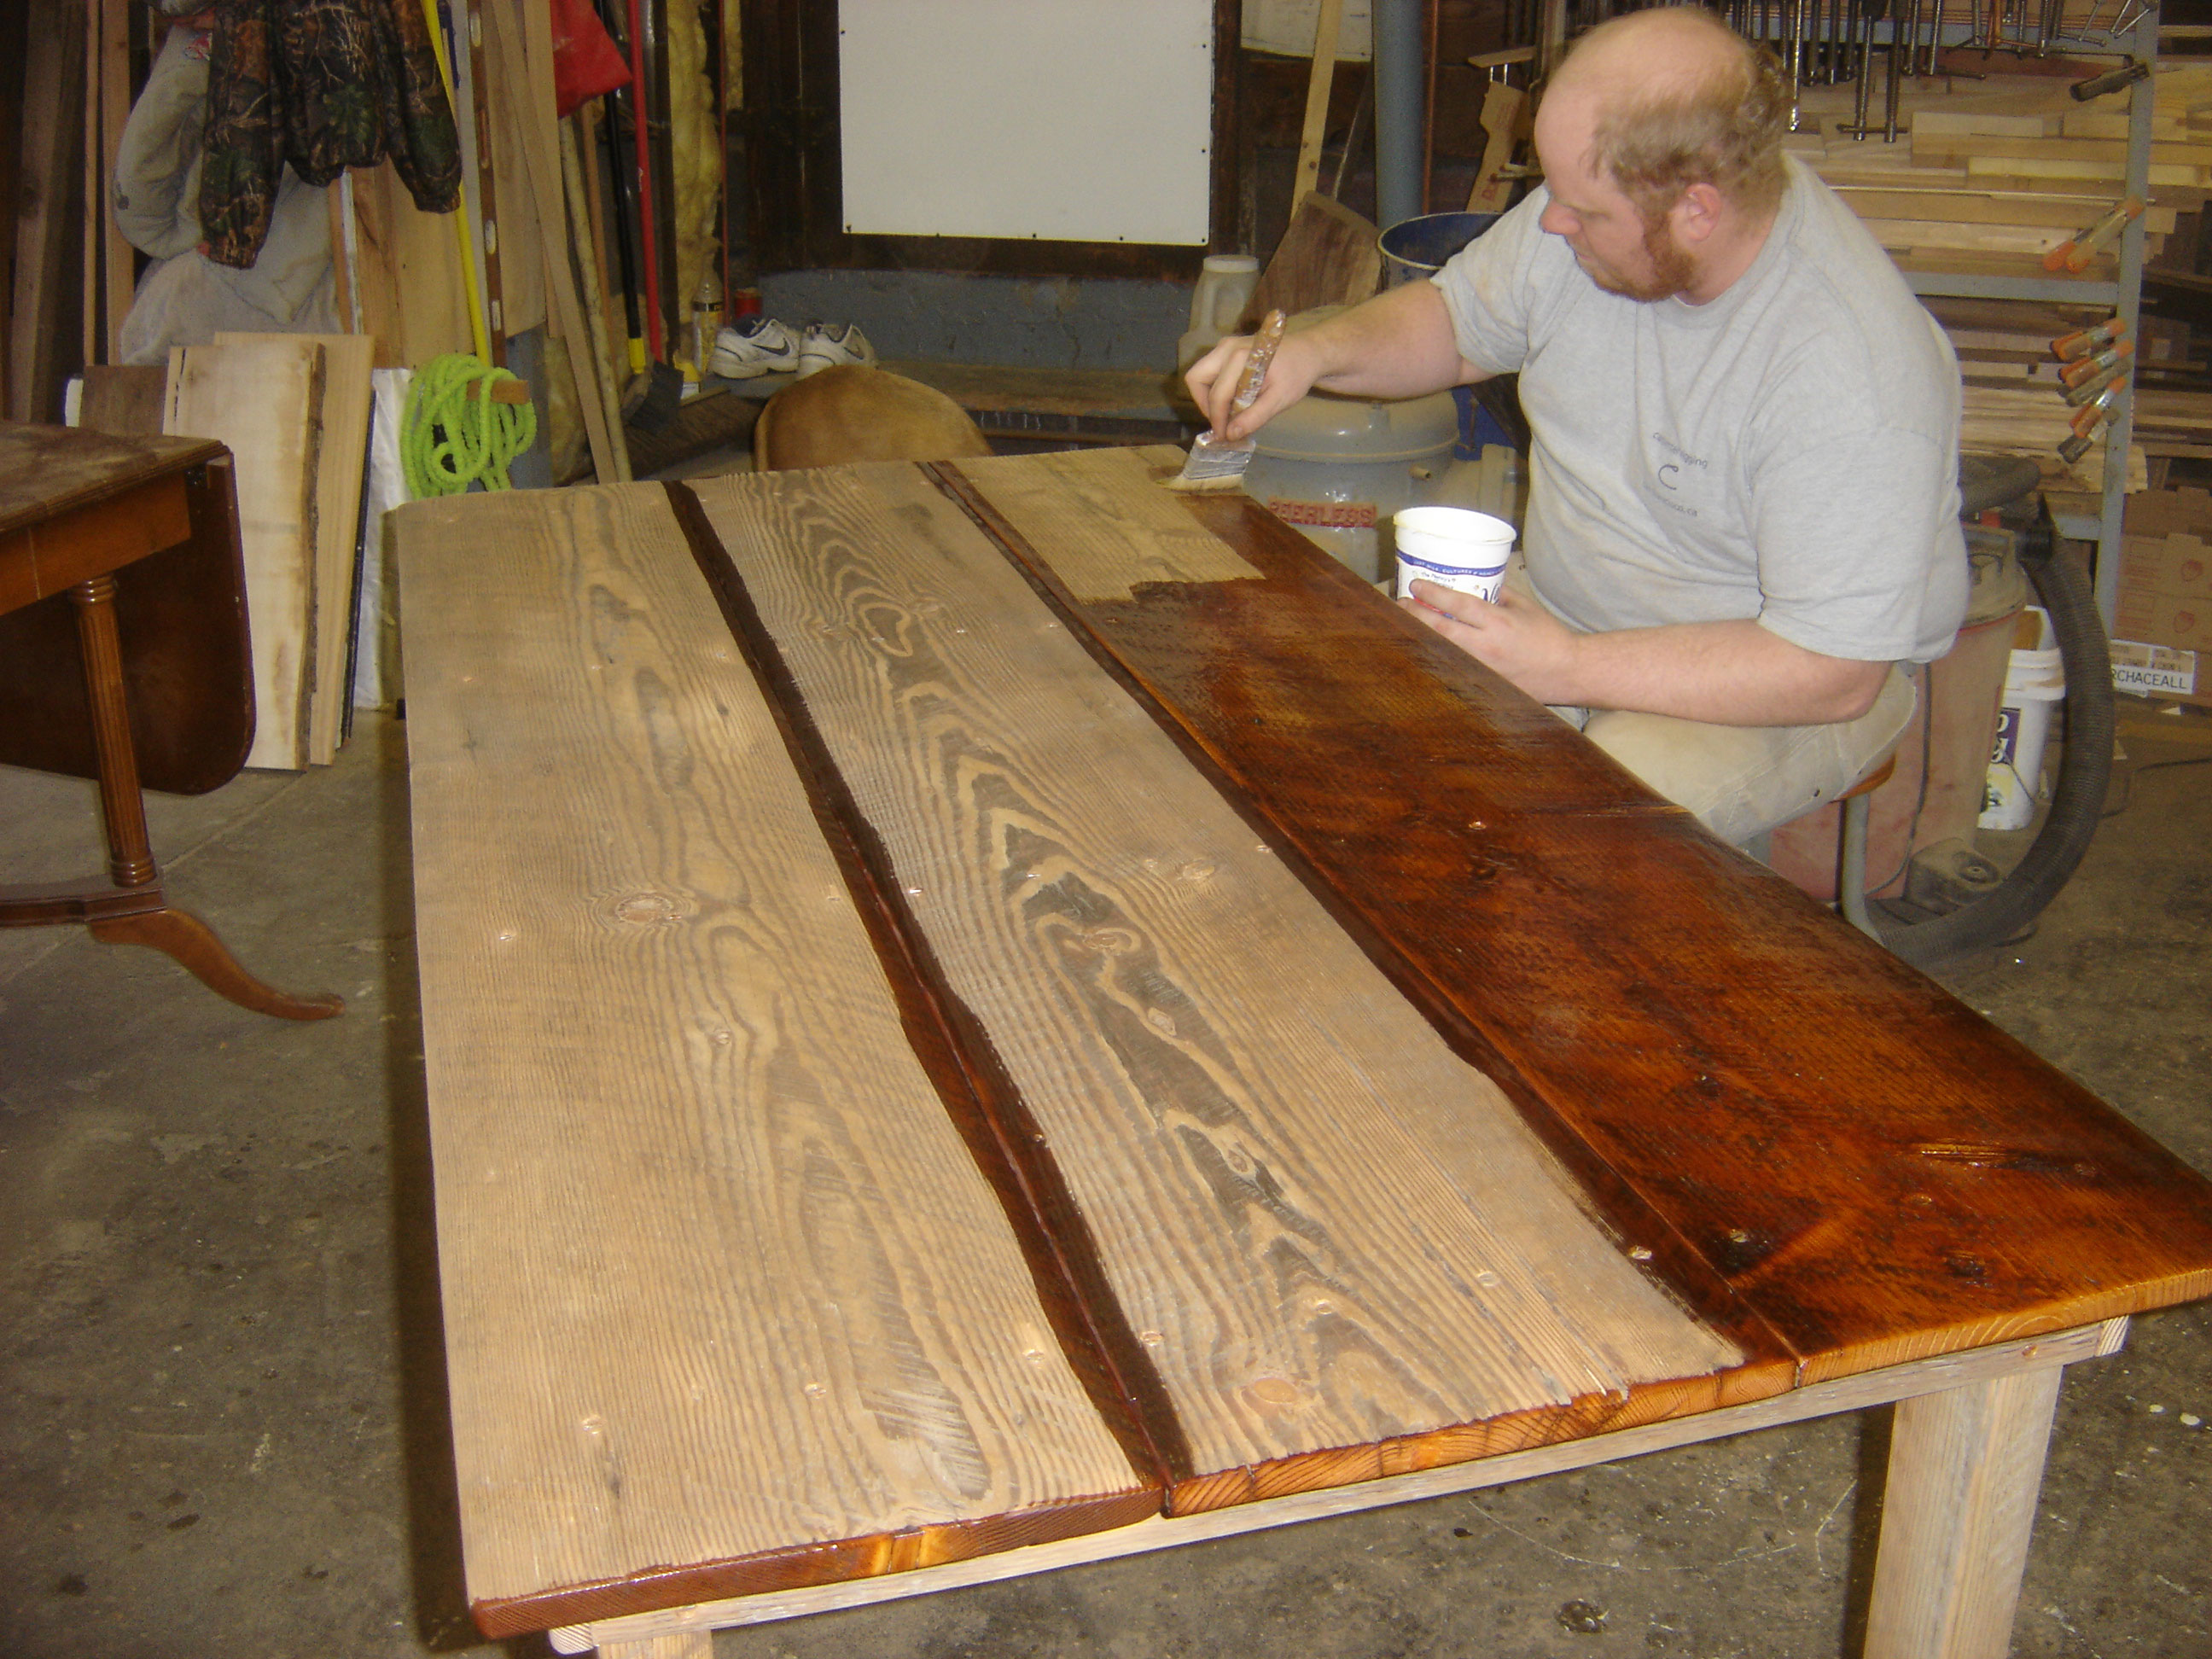
Paint removal
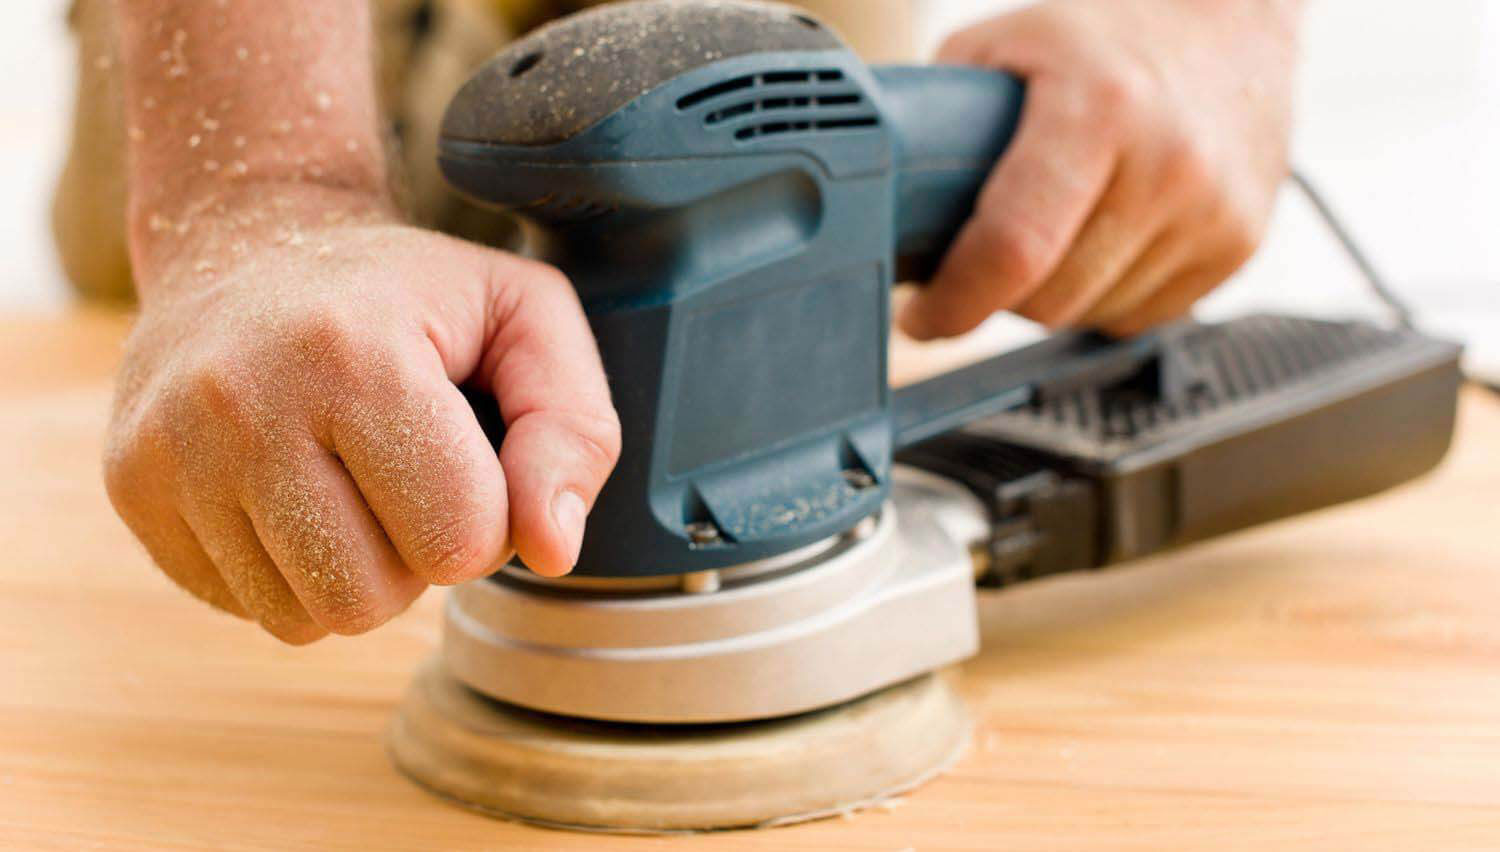
The process of removing the varnish takes a long time and must be carried out with the appropriate removal products. We can do it in the place where the wood is installed, but if there is a way to take it out to work in a place like the garage, much better.
If we do it anyway without disassembling it, mask the adjacent areas with painter’s tape and protect the floor with rags and papers.
The sanding process can take some time as we have to do it until the wood is no longer shiny. It is advisable to take a few days to make it look good. Also, always use a mask to avoid allergies and poisoning.
To sand an area, use a damp cloth to remove excess wood dust.
Never proceed without first repairing the wood
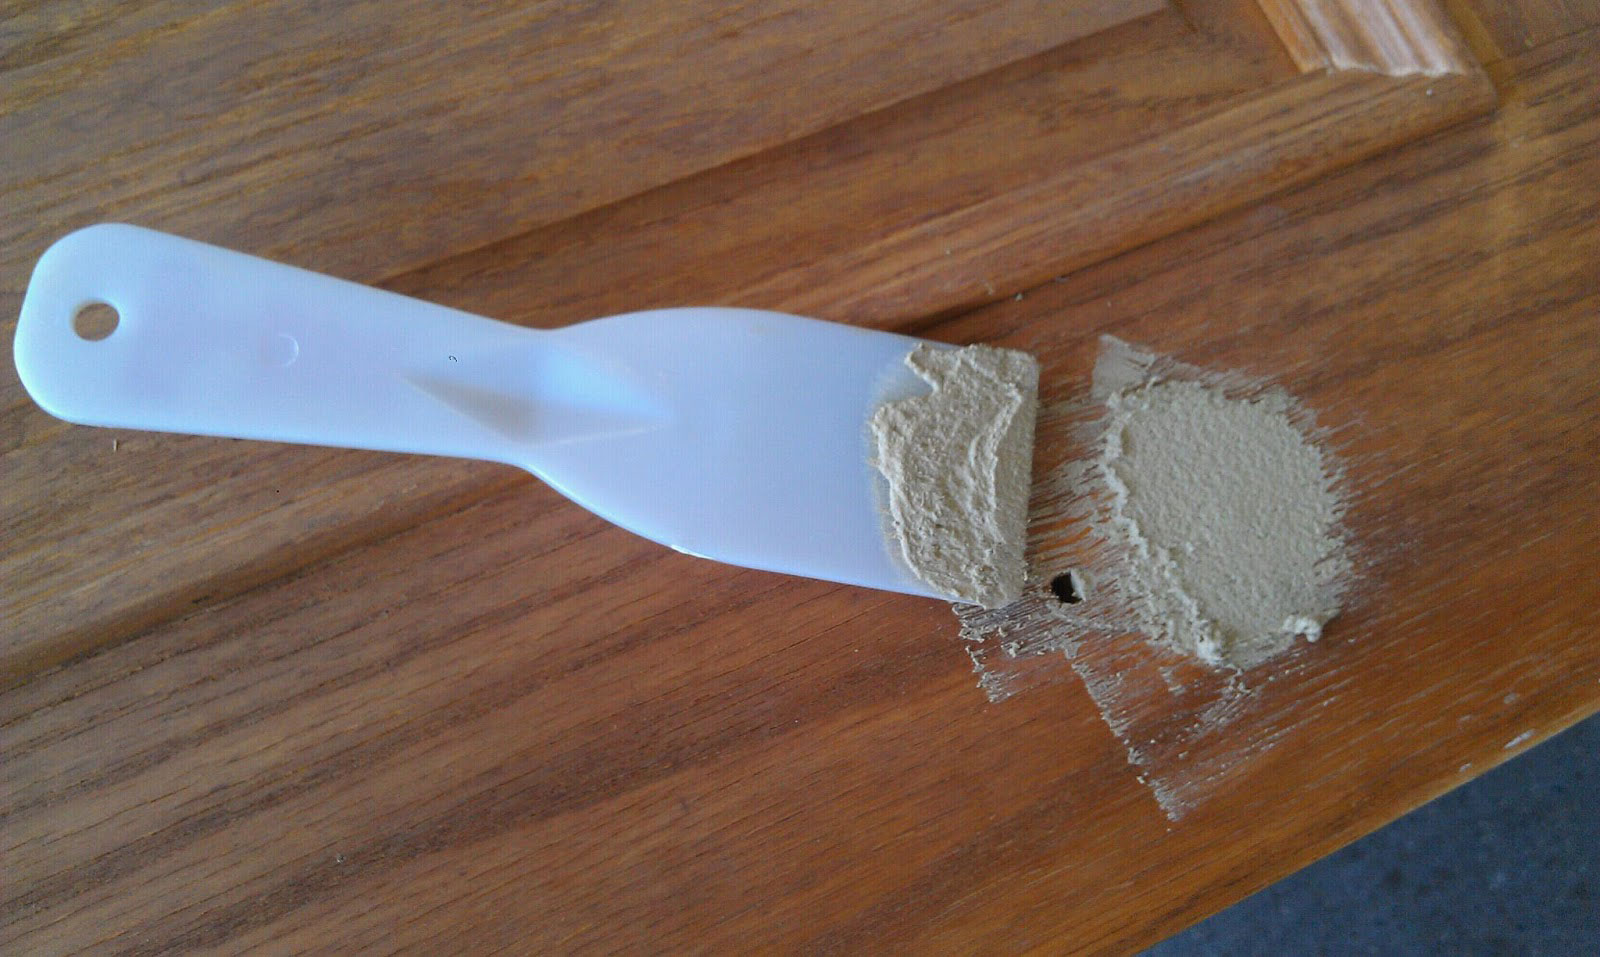
If cracks or bumps have formed, you must repair them before proceeding so as not to affect the result. For this you need wooden spatula, which is available in the hardware store. After the paste is applied and dried, remove excess material with sandpaper and then clean it.
Another thing that you have to do and not necessarily fall into the repair category is to fill the holes with putty paste to smooth the wood. The painting of finished wood depends to a large extent on the quality that it shows in the execution. Therefore, we have to make sure that there are no defects.
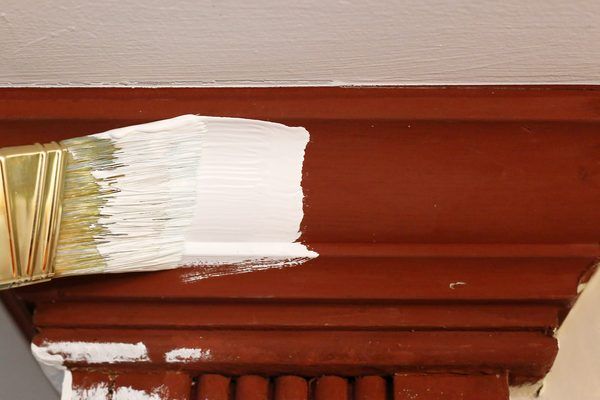
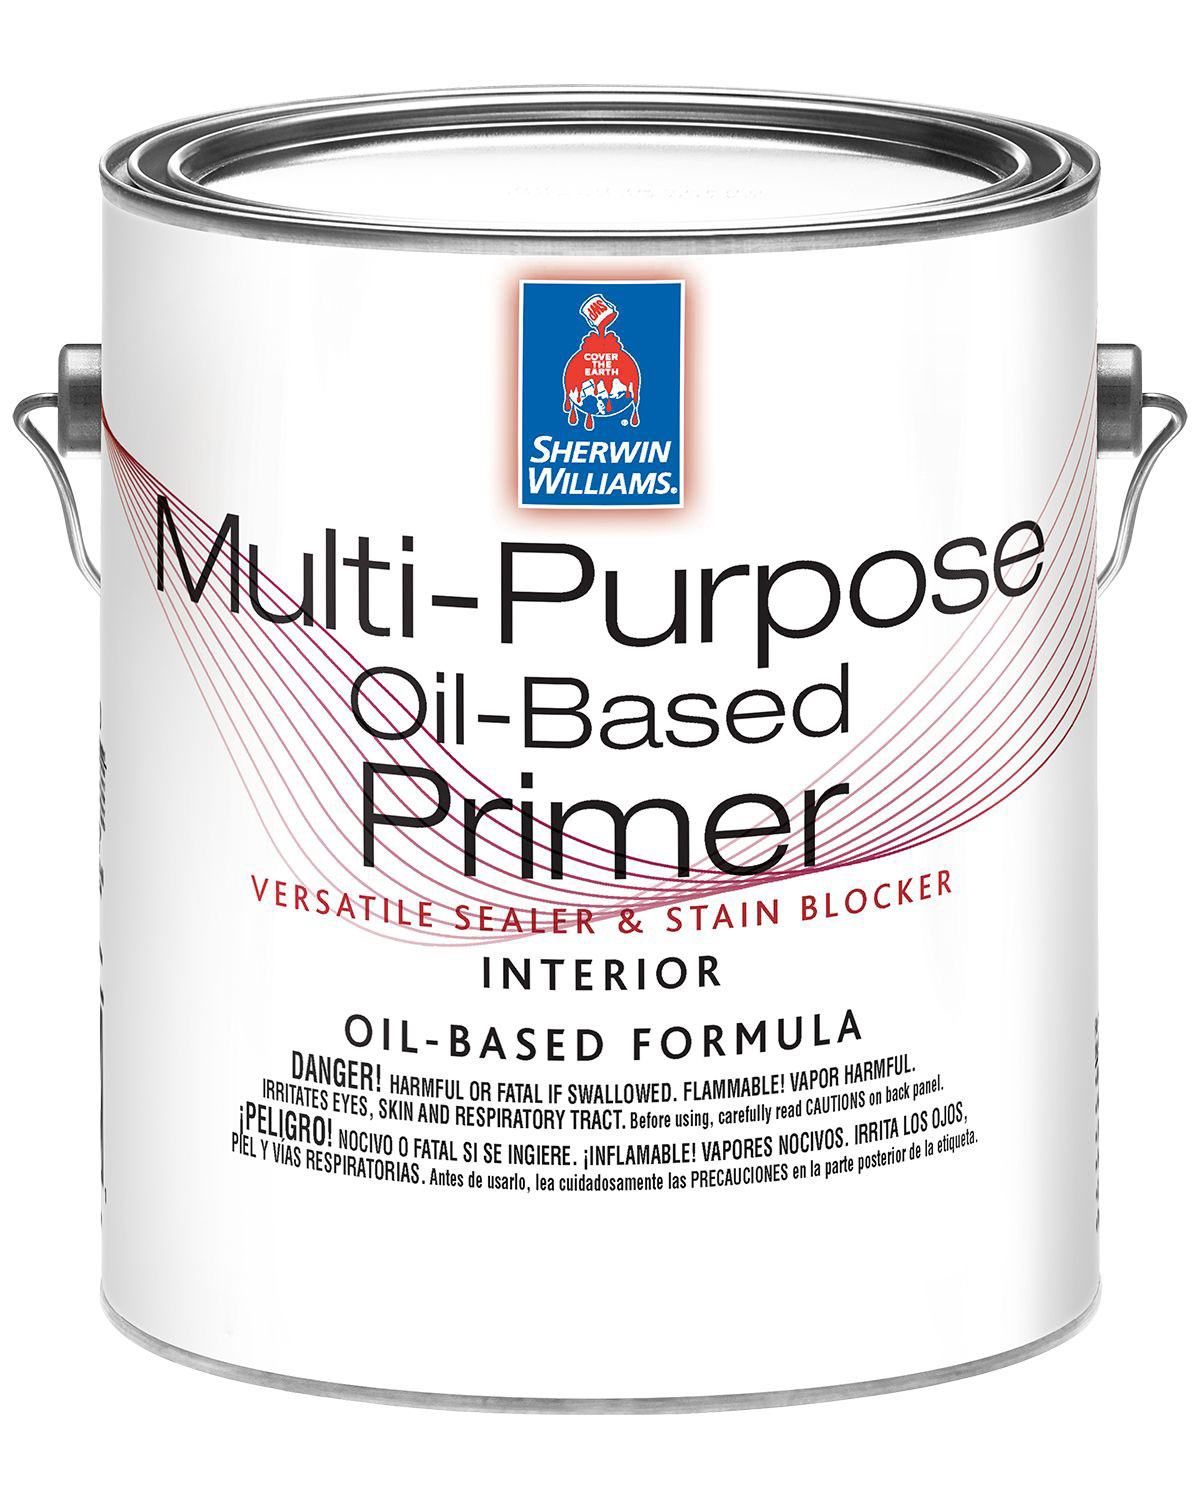
It’s time to apply the primer
Before applying the paint, we need to apply a layer of primer that will ensure that our work is not lost. The primers are available in base oil or varnish, and the right choice depends only on the type of paint spot we want to cover.
Tell the seller in our trusted hardware store what type of stain will change and they should tell you what type of primer you should use.
The primers work differently, so there are some that dry in one night and others where it is advisable to let them stand for 2 days. Those made from shellac, for example, dry in a couple of hours.
For a better result, try the primer to match the color of the stain you’re painting, as it is usually filtered and can cause unwanted stains.
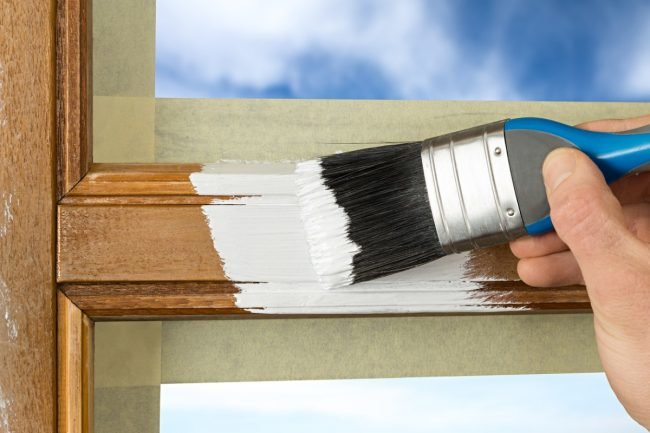
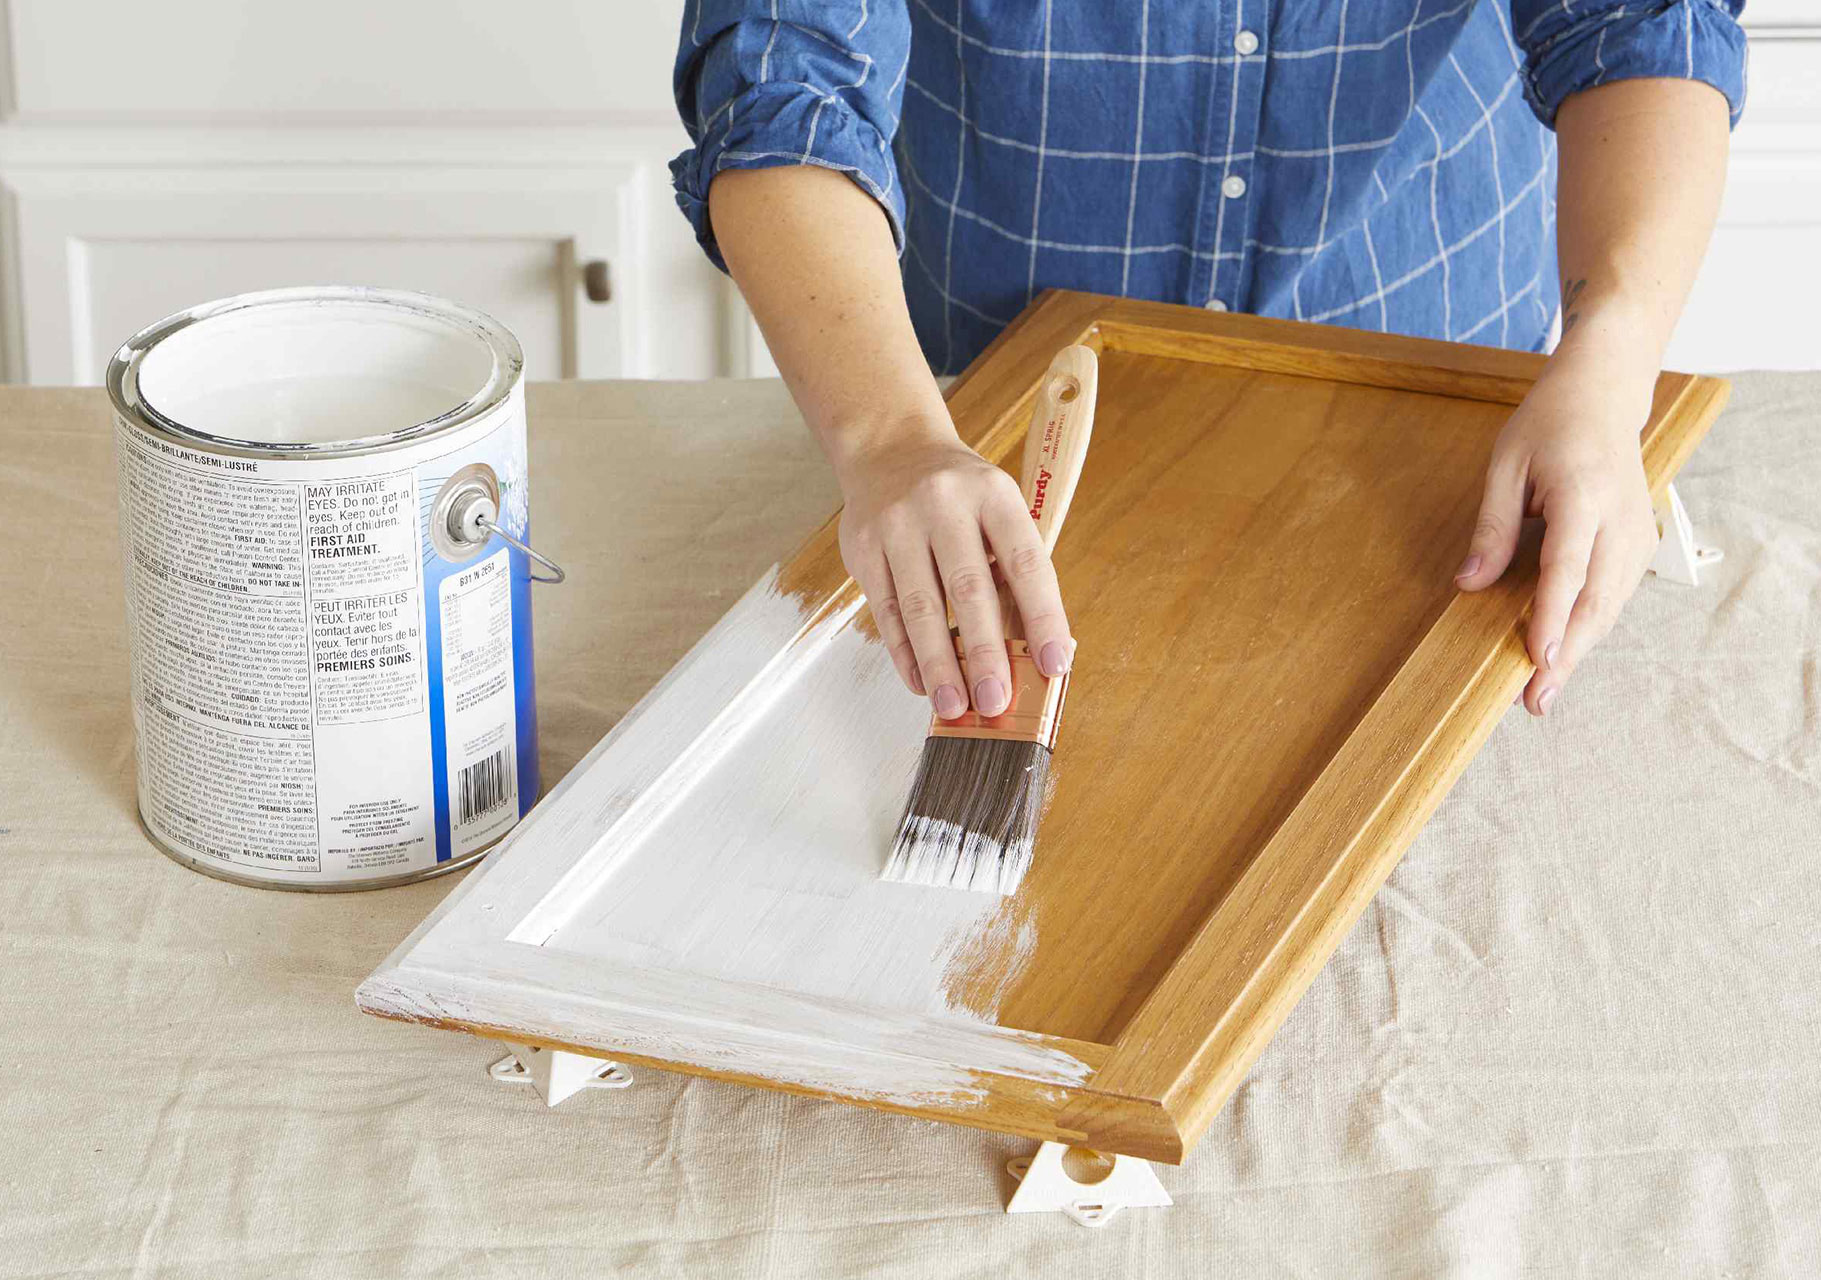
We are ready to paint
Can I paint over stains? If we have already answered all of the previous steps in the affirmative, we are ready to paint.
If you’re looking for a matte finish, the latex-based paint is perfect and dries quickly. On the other hand, if we want a shiny look, we need to use oil paint, although it takes a little longer to dry.
In any case, we recommend using oil paint if it is a frequently used piece of furniture, as it is more resistant. Always use at least two coats of paint for the best quality (especially on dark spots that are harder to hide).
Once we have chosen the color we want to use we will paint the wood. If we are using two or more coats, make sure that the previous one is completely dry.
A tip: if the paint we use is oil based, it is best if the primer is oil based. Similarly, if the painting is based on latex, the primer should be the same. You can also skip the step of priming if you buy paint that already contains it in the mix. This does not mean that you should not consult a painter before making a decision.
Keep in mind that the room we paint in needs to be ventilated as these products give off a very strong aroma. If you can afford it, work outdoors.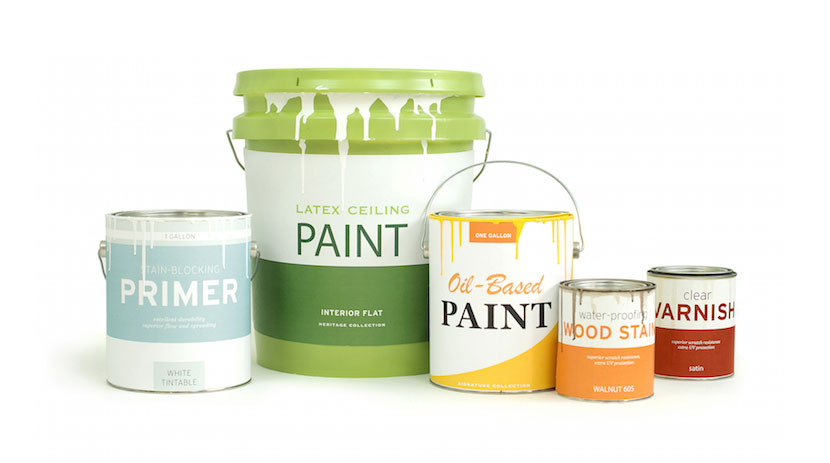 The application of the paint also depends on the type we use. When it comes to latex-based paints, we have the freedom to use brushes or rollers. For oil paints, it is best to use a brush with natural bristles. In the first case the color is ready in 4 hours, in the second case it dries after about 8 hours.
Now it’s time to apply a second coat of paint. Repaint the entire piece of wood using the same procedure. If you still don’t get the color you want, apply another coat of paint and continue until you get the result you want.
It’s time to put it all together
After the painting process, we have to put everything back in its place. That is, when we remove the pieces of wood, it’s time to get them back where they were. Likewise, any decoration that it had, such as B. door handles, screws, etc., can now be placed at their locations.
If you liked reading this article about painting over stained wood, you should also read this: